Pumpkin Painting is easy & fun with step by step guide

Pumpkin painting for the less Artistic and most Enthsiastic
I wanted pumpkins that would be festive and could survive until Thanksgiving. I started this family tradition years ago.
I will share step by step instructions for painting a pumpkin.
Some are Halloween themed, some are Holiday themed and then some are purely original. I believe creativity is therapy for anyone regardless of their age or artistic ability.
Holiday Fun with Painted Pumpkins
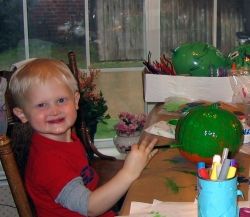
I have never met a kid who did not like to paint.
Just plan the bath for right after.
Choosing the pumpkins
I make sure they can stand up on their own. Think small sizes for younger painters who want to participate and be done quickly. I prefer a more smooth, flat and ridge free pumpkin. Store pumpkins with space around them so air can circulate.
Draw a draft picture
Sometimes it takes a bit of coaxing and tossing ideas out to get children to draw a picture for their pumpkin. All they really want to do is paint. For the younger or less imaginative pumpkin painter I suggest a picture similar to coloring book pictures. This will lead to a better product and success rate.
Get on-line and search for their favorite things that are printable. You need a draft drawing that is colored in order to chose the paint colors that will be needed for the pumpkin. I use crayons, markers or even colored pencils for the draft drawing.
Preparing the pumpkin
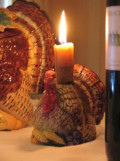
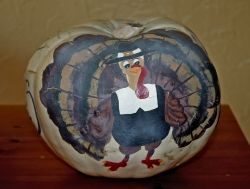
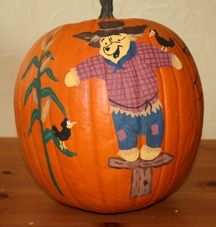
A Thanksgiving Painted Pumpkin
I thoroughly wash them. I then let them dry completely. Think about if you want to paint the entire pumpkin a solid color for a backdrop to your idea. This is the time to spray paint a solid color as a background. You may want to consider not covering the entire pumpkin so it still looks like a pumpkin. You can paint only the front in that case.
I have tried both so let your creativity guide you.
Transfer drawing to the pumpkin
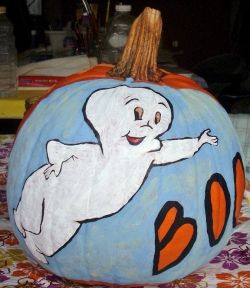
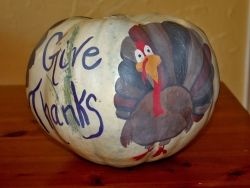
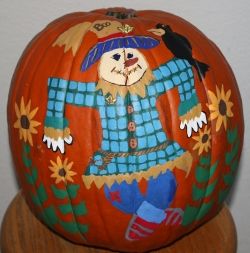
Another Thanksgiving Pumpkin
I use a thin lined crayola marker or even a very dull pencil. Be careful not to push very firm or you will puncture the rind which will lead to mold and then rotting. If you use a crayola marker then use the lightest color possible. Crayola markers can be erased using a q-tip dipped in water. My husband uses a very thin lined sharpie marker. Beware sharpie does not erase or wipe off. It is permanent. (You could use sharpie markers if you like instead of paint. It dries much faster.) You can try to freehand paint without transferring the drawing. I would practice on paper with paint first.
Other ways to transfer your drawing to the pumpkin
Make sure the pattern or drawing is adapted to the size of your pumpkin. Using a computer program to scan and resize the picture is the easiest way to make certain you keep the correct proportions. Trace the picture onto tracing paper and then use graphite paper. Put the graphite paper between the pumpkin and the tracing paper with the graphite side facing the pumpkin to transfer the picture. Tape them in position. It helps to trim the tracing paper so the graphite paper's edges are slightly exposed. The tape will stick to both papers and the pumpkin.
Now carefully and firmly trace your drawing with a chopstick or a very, very dull pencil. Check to see if it has transferred by lifting a corner before taking all the tape off.
Another method is to tape the drawing to the pumpkin and using the chopstick or a dulled toothpick to trace the drawing. Only use enough pressure to leave a faint indentation on the pumpkin. Do not press hard enough to pierce the pumpkin.
Supplies
As you get your creativity flowing you will probably come up with supplies not on this list.
- Pumpkins
- Paintbrushes
- Acrylic Paints
- Spray paint
- Spray Sealer
- Graphite Paper / Sketch Paper / Tracing Paper
- Pencil / Chopsticks / Toothpicks
- Paper Towels / Rags
- Cup of water - I use old small gatorade bottles
- Paper plates to mix paints or small plastic cocktail plates
- Glitter / Buttons / Beads
- Strong Glue- not all glues are equal
Getting the supplies ready
I set up a pumpkin station that can stay put for a few days or can easily be put away and then put out back out. It seems with normal life it is impossible to finish a painted pumpkin in just a day.
Don't forget a drop cloth of some sort. I use a cheap vinyl tablecloth and tape it around to the bottom of my table. Newspaper will work as well.
Each time I begin working I always have cups of water, paper towels, damp small cloths, q-tips, dull pencils, toothpicks, and plates to mix paint. I like to use paint trays for mixing my paints for each pumpkin and others prefer small plastic cocktail plates.
Paintbrushes can make a huge difference
Another learned lesson
Different brushes make different strokes and have different purposes. A good quality synthetic brush will work best. The different designs of brushes are round, flat-ended, pointed, chiseled, and they range in width from one hair to inches. Mostly you will find round or square ended brushes.
A beginner can use a small linear brush for detailing and outlining then a large flat brush for painting larger areas. The smaller pointed short bristled brushes are necessary for outlining and detailing. Most inexpensive brushes do not come to a point so being precise will be frustrating. A thinner brush is better for details.
All the brushes need to be cleaned thoroughly after use. If you leave it in the water the bristles get bent and stick to the paint which settles at the bottom of the water and then they are ruined. If you are taking a break then wipe the brush with a damp cloth and lay it down flat.
Painting a color underneath your picture
If you have one color that serves as a backdrop to the rest of your picture paint it on first. Wait for it to dry completely before painting your picture on top.
Time to Paint Pumpkins
NO worries a damp paper towel will wipe mistakes right off
It is good to pick a small area on the pumpkin to start and only get those colors ready. I have learned it is much better to start at the top of the pumpkin and work your way down. Otherwise you get paint on your hand and smear your work.
I have also learned that propping your pumpkin up at times or tilting it back may be helpful. I have used things such as big bowls (good for tilting a pumpkin backwards), small foot stools, 2x4 boards, a folded towel and other items to adjust the pumpkin how you need it for painting your masterpiece.
A reminder, once you have mixed a color for painting then save it for a while because you may want it for touch up or for an another area. It is hard to remix the exact color. Wait for each painted color to dry completely before adding the next especially if they are next to one another or on top of one another.
If you goof wait
Do not fret if the image or painting is not perfect.
When the paint dries start again.
The colors will bring the image to life. Just think, imperfection gives your pumpkin designs character.
Stopping and starting again
Often a little water might be needed when you start painting again. Go easy with the water. I use a baby dropper so I can put one drop at a time.
Once the paint is completely dry, spray sealer generously over the painted area and allow to dry.
Your pumpkins can be displayed outside except when it freezes or there is a frost because the extreme cold makes the pumpkin expand and then can cause the paint to crack.
World Series Try
We were inspired by the Texas Rangers one year.
Creativity has no limits.
Painting Pumpkins
i
Once you start it is hard to stop!
What would you paint on your pumpkin - Please share
Halloween or Holiday
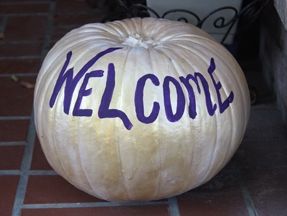
Simplicity
Traditions that start when they are young & take you through the years
Buy A Pumpkin
The very first step is buying a pumpkin.
Pick out a good one.Go back to top if you need a review on picking out a pumpkin.
Albums for the songs above
I have all of these albums and enjoy listening to them.
NOTE:
All the text and photos in this article are the creation and property of the author, unless otherwise noted. Thanks for respecting intellectual and image copyright laws and principles.
All photos in this article, are the exclusive property of Coolaunt. Please do not copy or reproduce these photos in any way without written permission from Coolaunt.
Add your tips.